

Editor's note: We make photography and video apps, so it's about time we released video versions of our essays. Check out the companion video shot in Kino 1.4, or read on for text!
Today we're launching support for Apple Log 2 in our award winning video app, Kino. Apple Log 2 is a new format that launched alongside the iPhone 17 Pro. To understand what makes it special, let's dig into the concept of Log and RAW video, why every camera maker uses a unique format, and why we took our time to add support to Kino.
A Brief Intro to Camera Processing
Every camera is opinionated, and this pre-dates modern cameras which use AI and computational photography to "fix" your photos for you. Even digital cameras from 20 years ago made creative choices on your behalf.
Left: Show with Halide Process Zero. Right: Olympus Verve from 2004.
Both of the following photos came from the exact same sensor data. Which one reflects reality?
In real life, you might have seen either version, because our perception constantly shifts based on our surroundings. If you were looking out the window of a room lit with bright, warm lights, you probably saw the version on the left. If you turned off the lights and let your eyes adjust, you probably saw the image on the right.
That's all to say that a camera is not an objective source of truth. A lot is subject to interpretation. Let's consider a more benign, unambiguous photo, starting with a crude version of the sensor data.
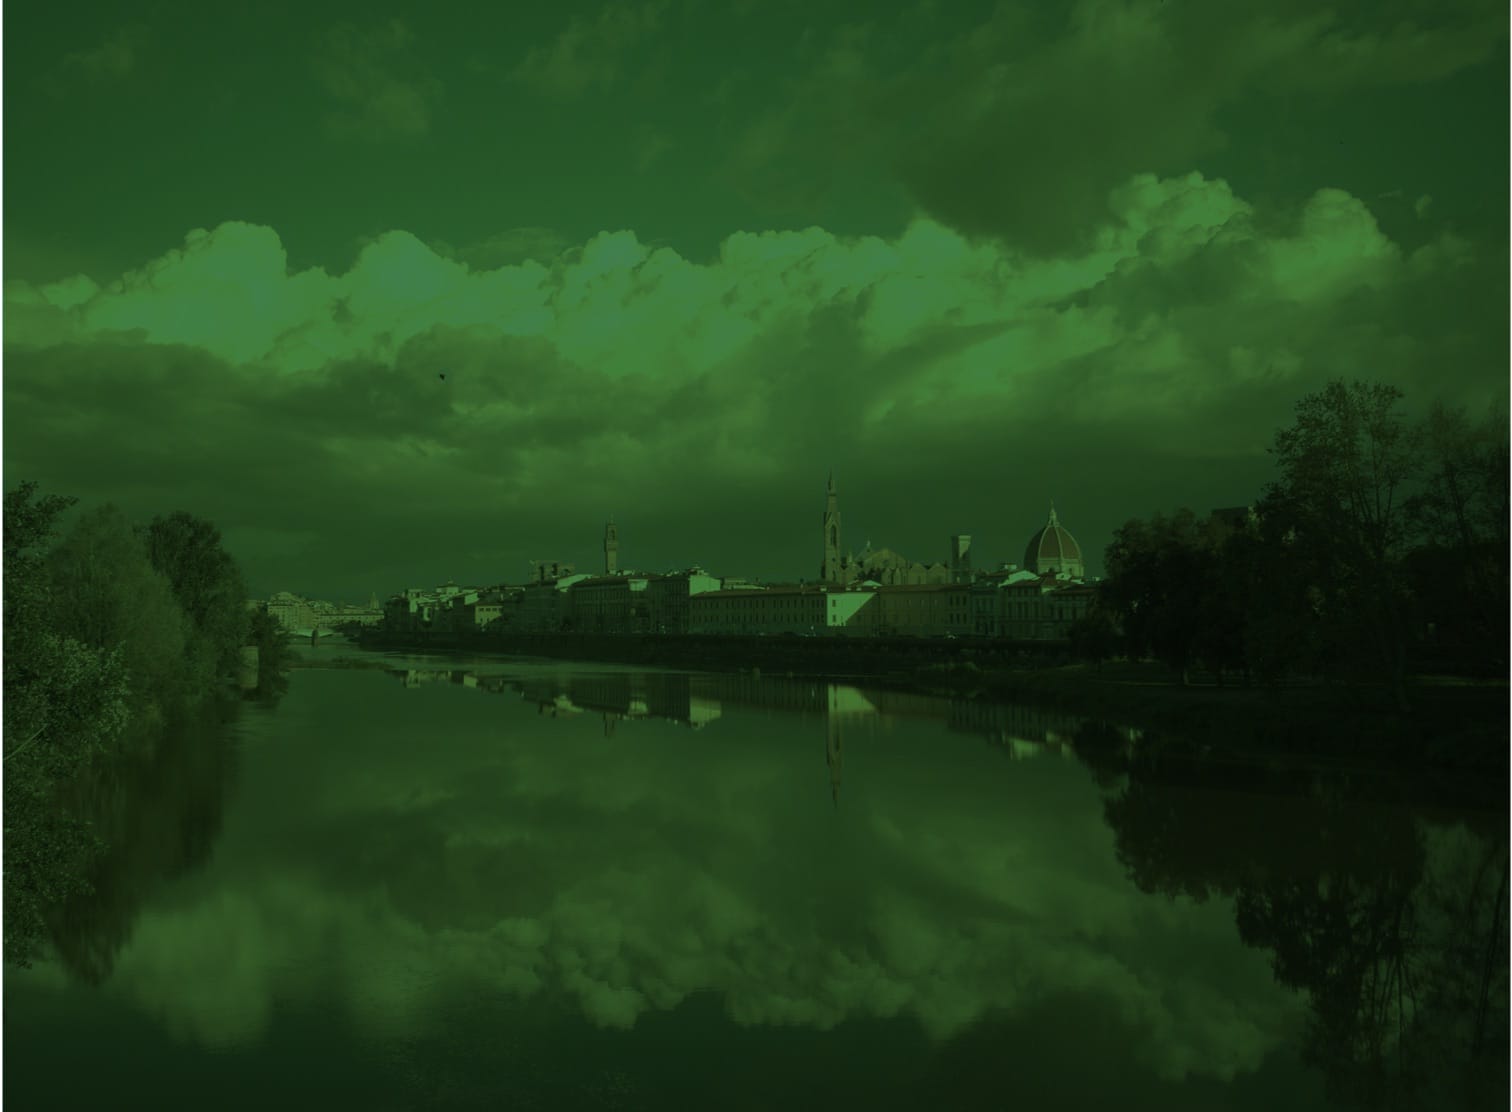
Why the green? If we zoom in, we see the separate red, green and blue values living alongside each other.
If you look close, you'll see there are twice as many green pixels as red or blue. That's just how most sensors are designed.
The first step of camera software is to fuse all these values together, and that requires some sophisticated algorithms to avoid introducing weird visual quirks. That "demosaic" step gets us:
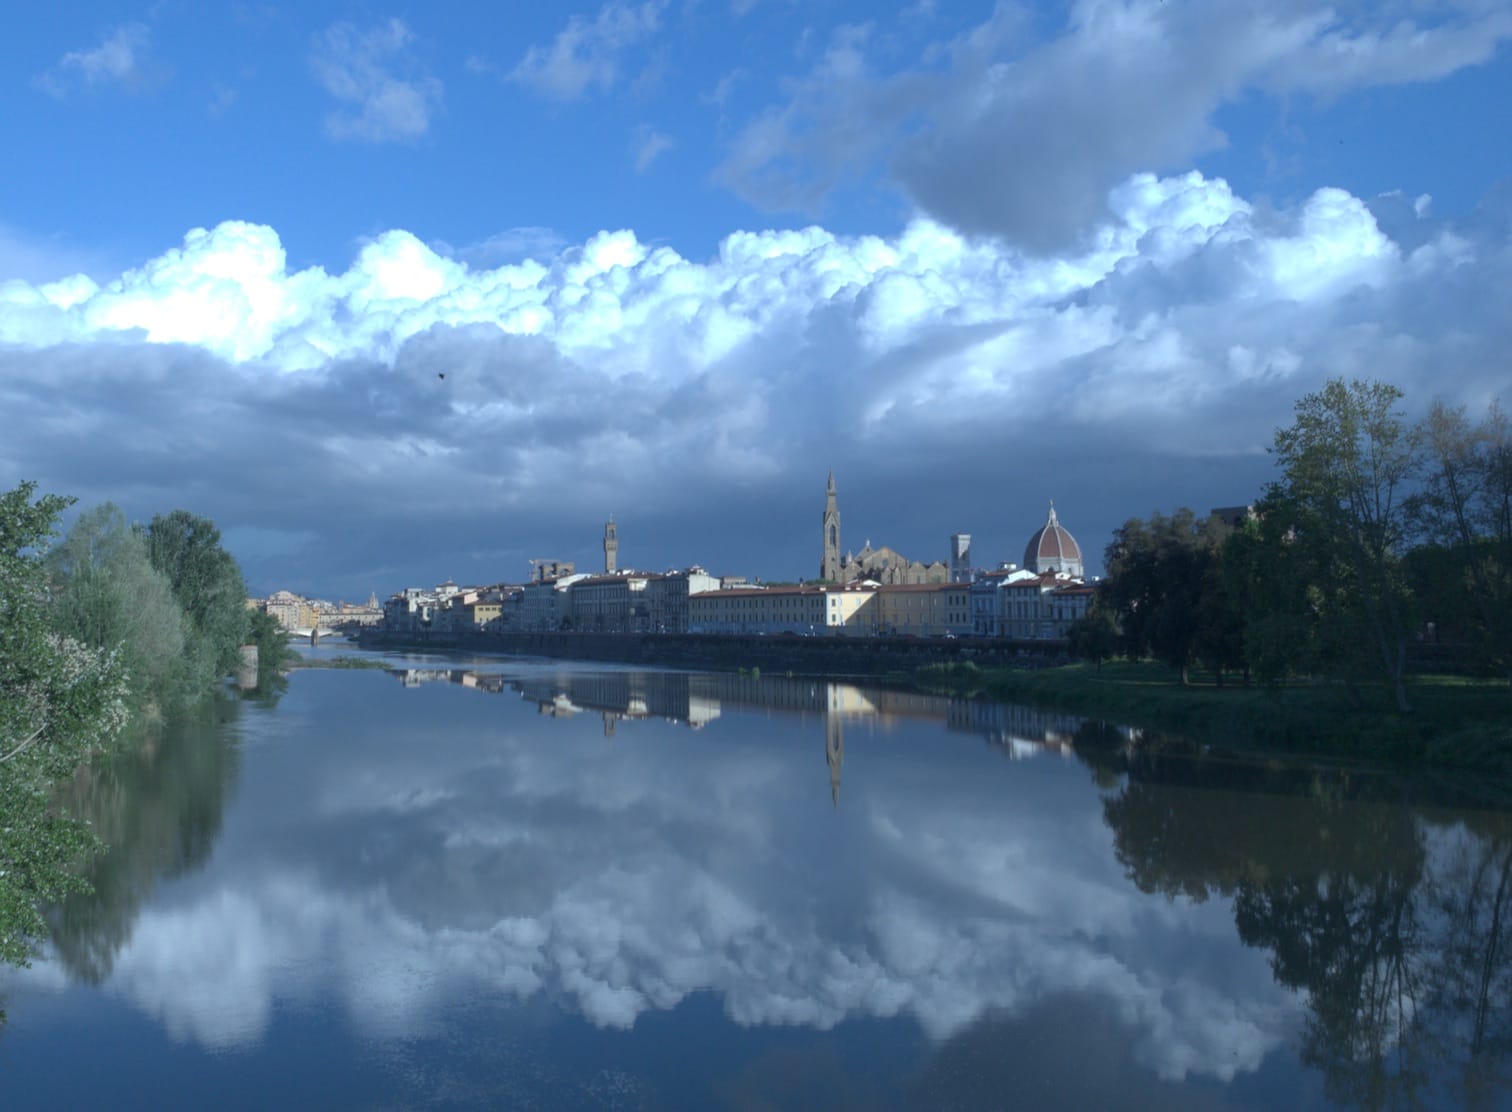
No, it wasn't that blue the day I captured the photo. That's because our minds adjust what we see so that black, whites, and grays appear neutral. Cameras use an algorithm to guess the right "white balance," and then apply a tint to account for it. That gives us…

It's getting close, so let's dig into details. It looks like the clouds were too bright, blowing out the highlights, but that actually didn't happen. The data for those clouds is still there, but it's too bright to display on screen.
At the same time, the overall image feels a bit flat. That's because we're used to viewing photos with more contrast. Let's make some tonal adjustments.

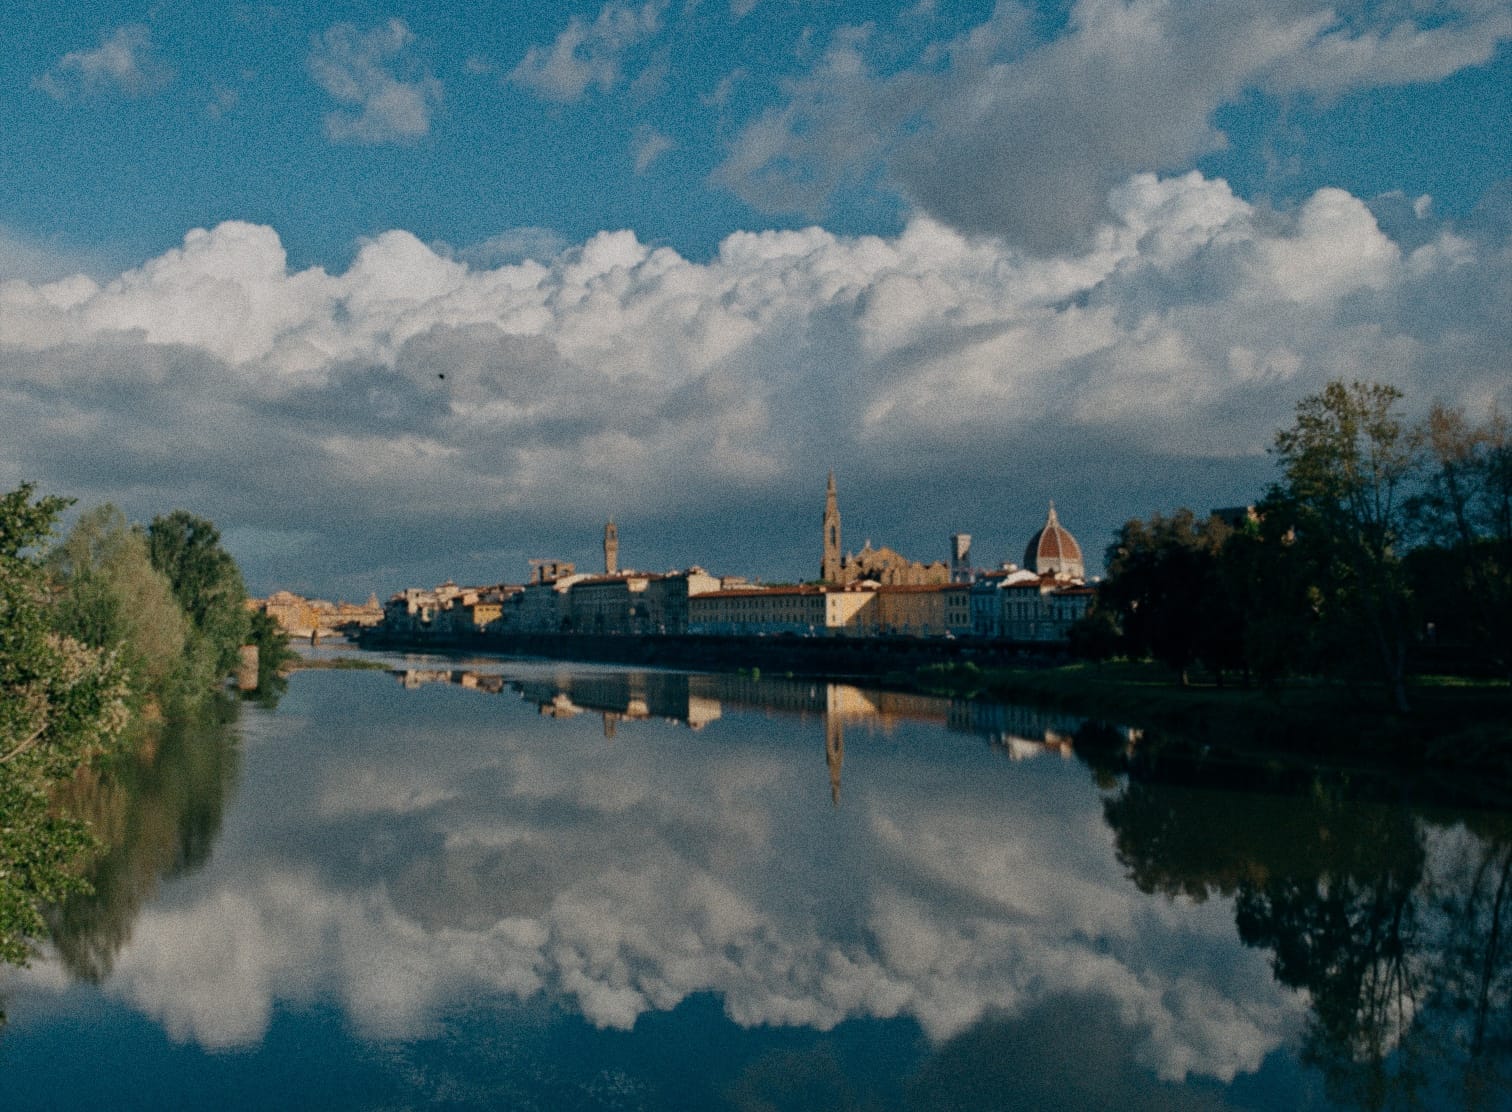
While I like the final look of my photo above, I refuse to call it correct. The amount of contrast and highlight recovery are subjective. Here's a different interpretation:
This is just a broad overview of all the steps a camera goes through processing an image. I didn't talk about removing dead pixels or correcting for lens imperfections. I just wanted to focus on a few big decisions that that can lead to dramatically different photos.
It's challenging for a photographer to make these decisions at the time they capture a photo. It's much easier to sit down at a computer and experiment with different versions before committing. Unfortunately, when your camera saves a JPEG, HEIC, or MP4, you need to commit to your creative choice at the time you capture the image or video. It's really hard to edit those files after the fact.
That's because these "processed" file formats are designed for viewing, not editing. When they're saved, your camera throws away a bunch of data in order to shrink the file, to make it quick to download and display on screen.
What if we saved the image data as soon as it's captured by a sensor, but before all of these creative decisions have been made? That's a "raw" file. It's just a snapshot of sensor data, before a camera interpreted it.
The best analogy I've heard involves cake. When your camera saves a JPEG, that's like buying a pre-made cake from a bakery. It's super convenient, assuming you like how the cake was made. If you don't like raisins, you'll be miserable plucking them out.
When your camera saves a raw file, it saves the ingredients to bake a cake. Now you can bake the cake however you want. The tradeoff is that developing these files, like baking a cake from scratch, requires a little extra work.
Let's take a break for self-promotion! Halide makes developing RAW files super easy. That photo above was developed with one tap in Halide Mark III, which is right now available as a technical preview. Ok, let's move on.
What is Log Video?
RAW files are more unwieldy than JPEGs. Their file sizes make them slow to download. Once downloaded, they take longer to load than JPEGs, because those algorithms I talked about can get pretty sophisticated. These were big challenges, decades ago, but today's phones are so fast that it's easy for photographers to work with RAW files as easily as JPEGs.
Video is a very different matter. Capturing images at 24, 60, or even 120 times per second requires fast storage, and a ton of it.
The solution is Log video, which you could think of as a slightly developed RAW. It keeps most of the important data, but encodes it in a file that's much faster than RAW to read and write. It also uses much less space.
The first trick is to save the image after that first step we showed above, where the red, green, and blue pixels are merged together. In the real world, you get little in the way of creative control during the demosaic step, and skipping it makes things way easier.
The next trick involves how light values are written to the file, which takes advantage of how humans perceive light. It's worth taking a moment to explain.
Consider this ramp of color patches:

You might think it gets 10% lighter with every patch.

This doesn't reflect the actual light being emitted from your screen. If you measured that with a light meter, the values would look like this:

Sorry about this tangent, but it's probably the most important concept to understand if you really want to master advanced photography and video. Humans don't have a straightforward perception of light. It's closer to this curve:

This is important because camera sensors record physical light values, not human perception. This means that RAW files usually waste a ton of bits on brightness values that most human beings won't notice!
Log video exploits human perception to save those bits. Before writing the image information to the file, it boosts the shadows using a logarithmic function, hence the "log" in the name. This is why the videos look so low contrast if you play them back in app that doesn't know it's playing a Log video.
Things look more normal in a video editor, once it applies the opposite of that log function.
We're getting close, but the images look really desaturated, which has to do with how the colors are saved, which we'll talk about in a moment. Luckily, our editor has a toggle to fix this for us.

Great! The color looks much closer to what I remember. With this neutral image, we're ready to make creative choices…
Why did we have to take that extra step to fix color saturation?
Log Squashes Color
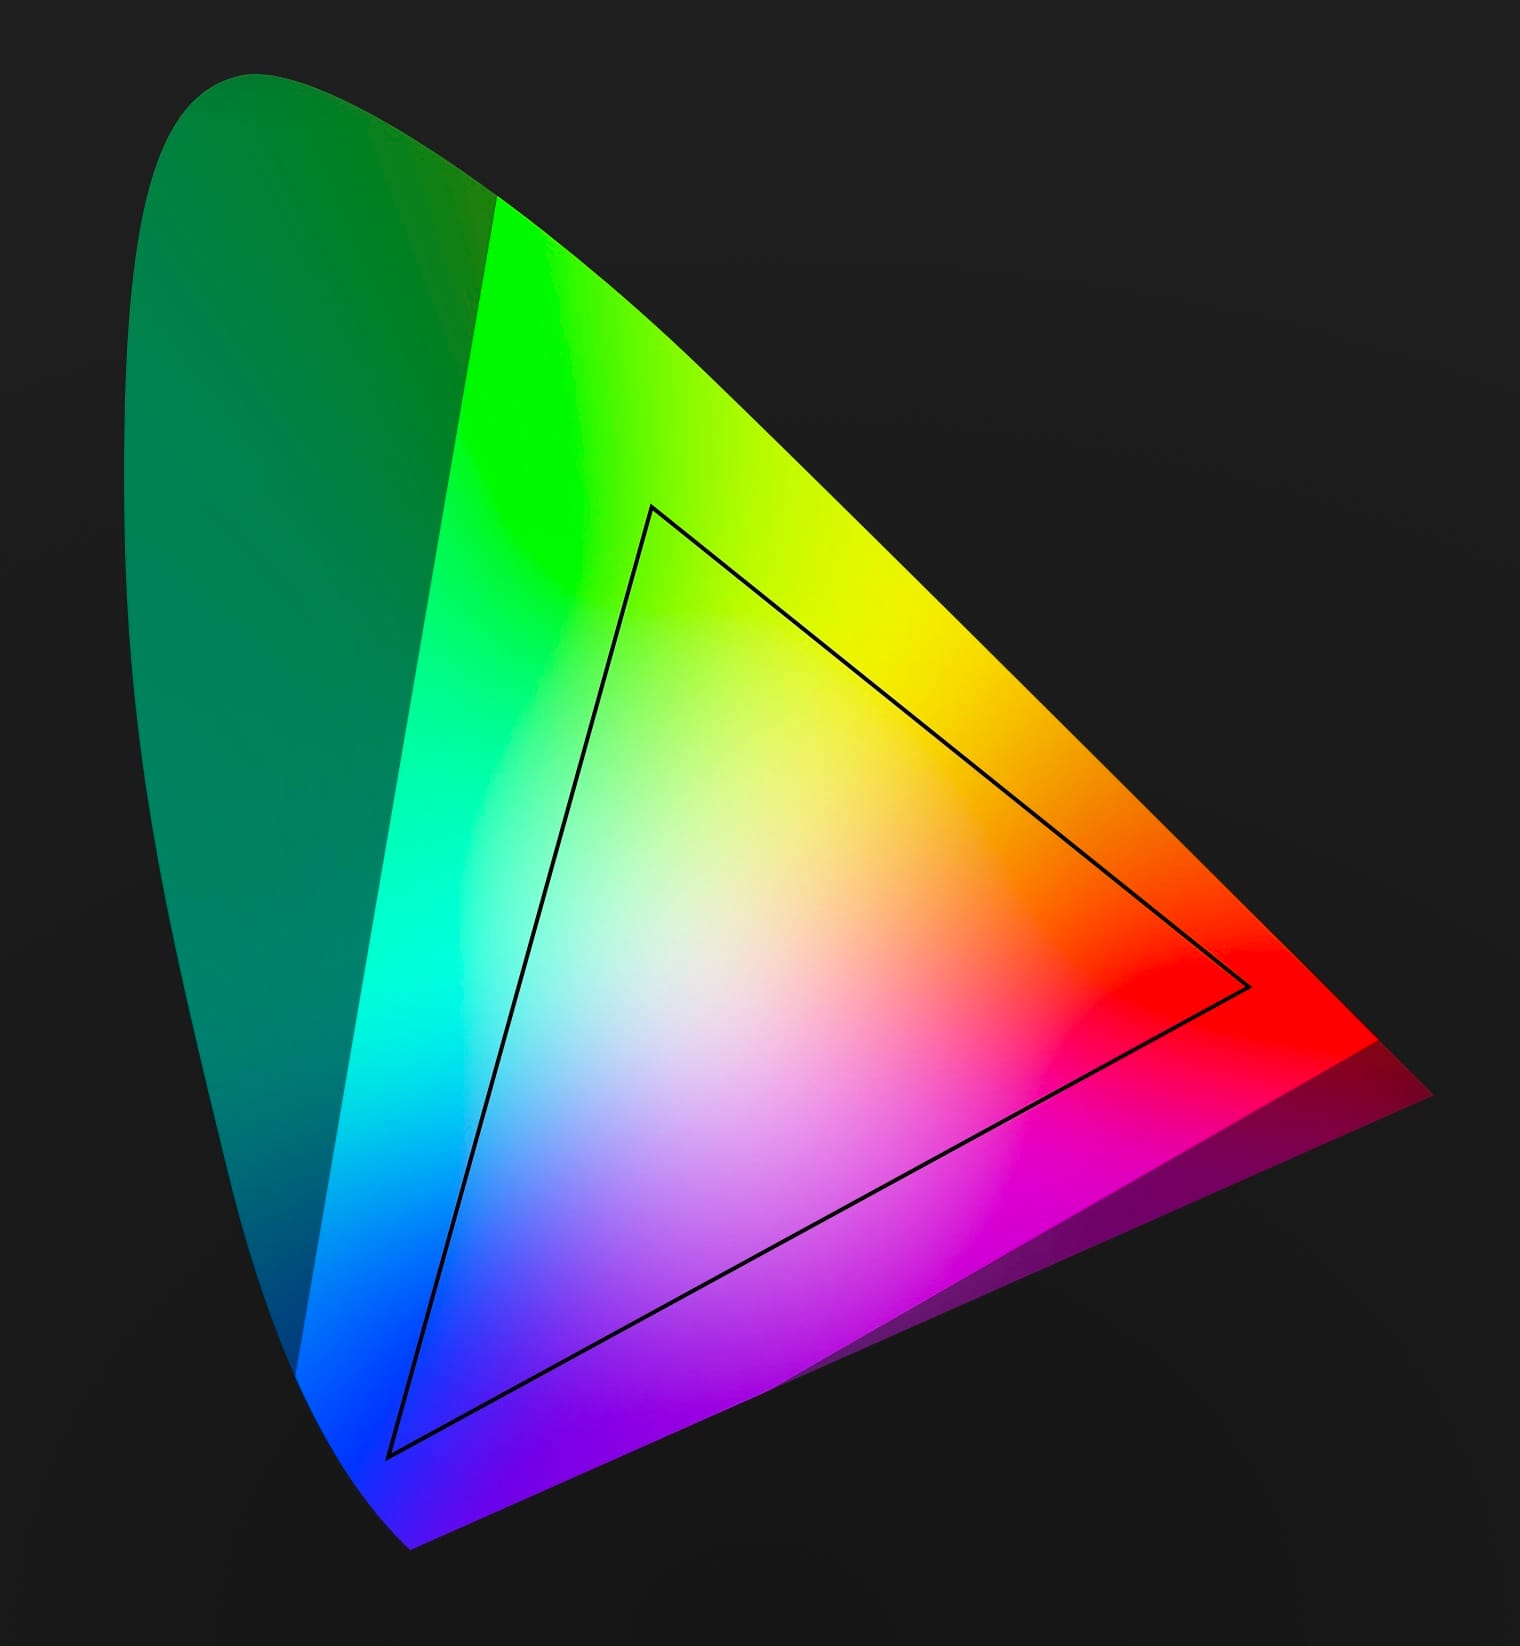
Camera sensors record a wider range of color than you can show on-screen. Consider this diagram that represents every color humans see.
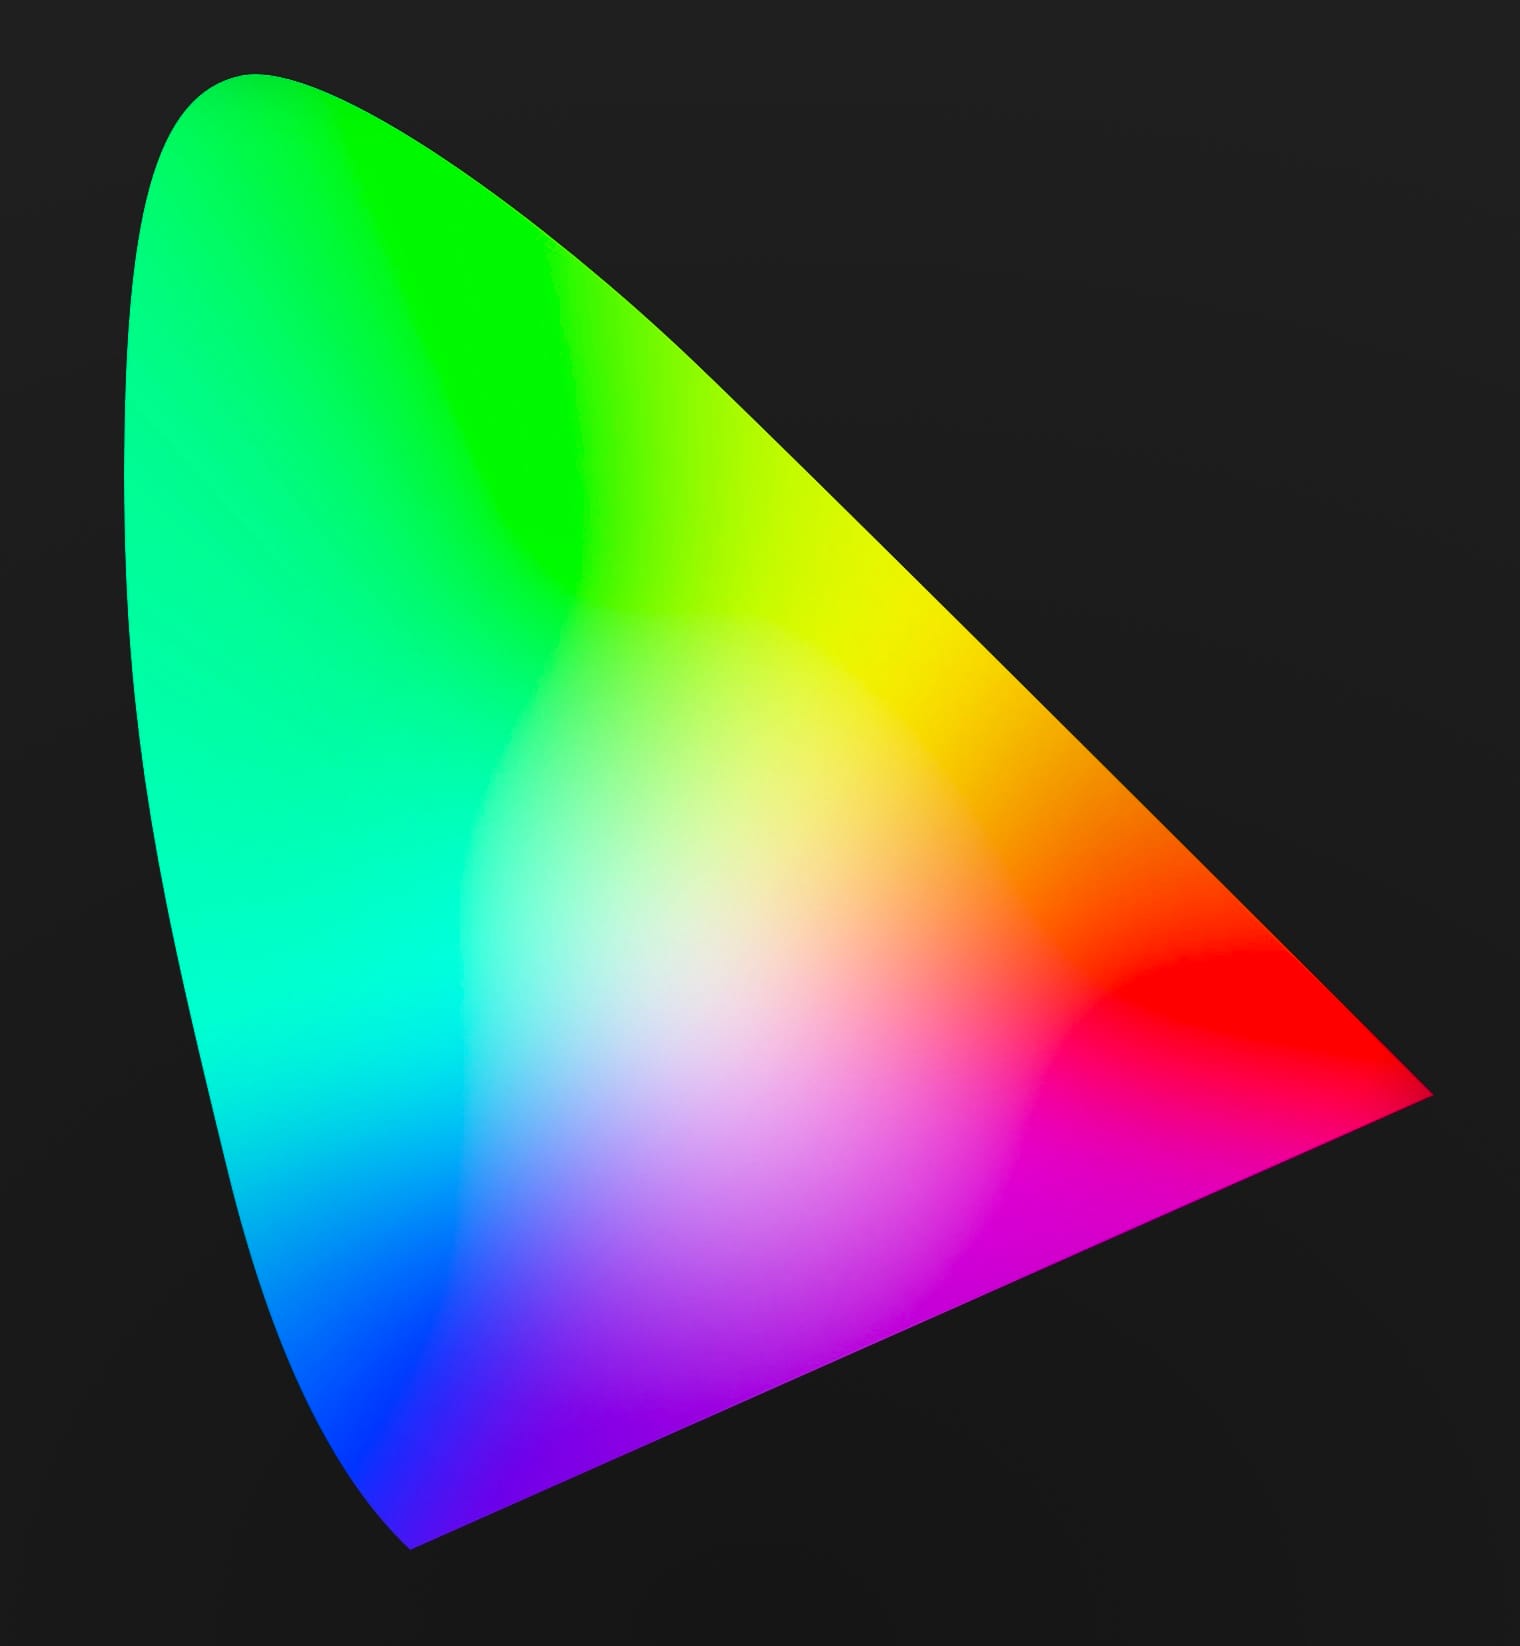
Why does it look like a horseshoe? It's a simplified scientific chart with a bit of a backstory that isn't worth going into.
Let's just cut out the clutter and focus on a small region of our chart.
That triangle covers the range of colors computer screens could display for decades. Today screens can display a bit more color, but we're often beholden to this limited range, due to backward compatibility.
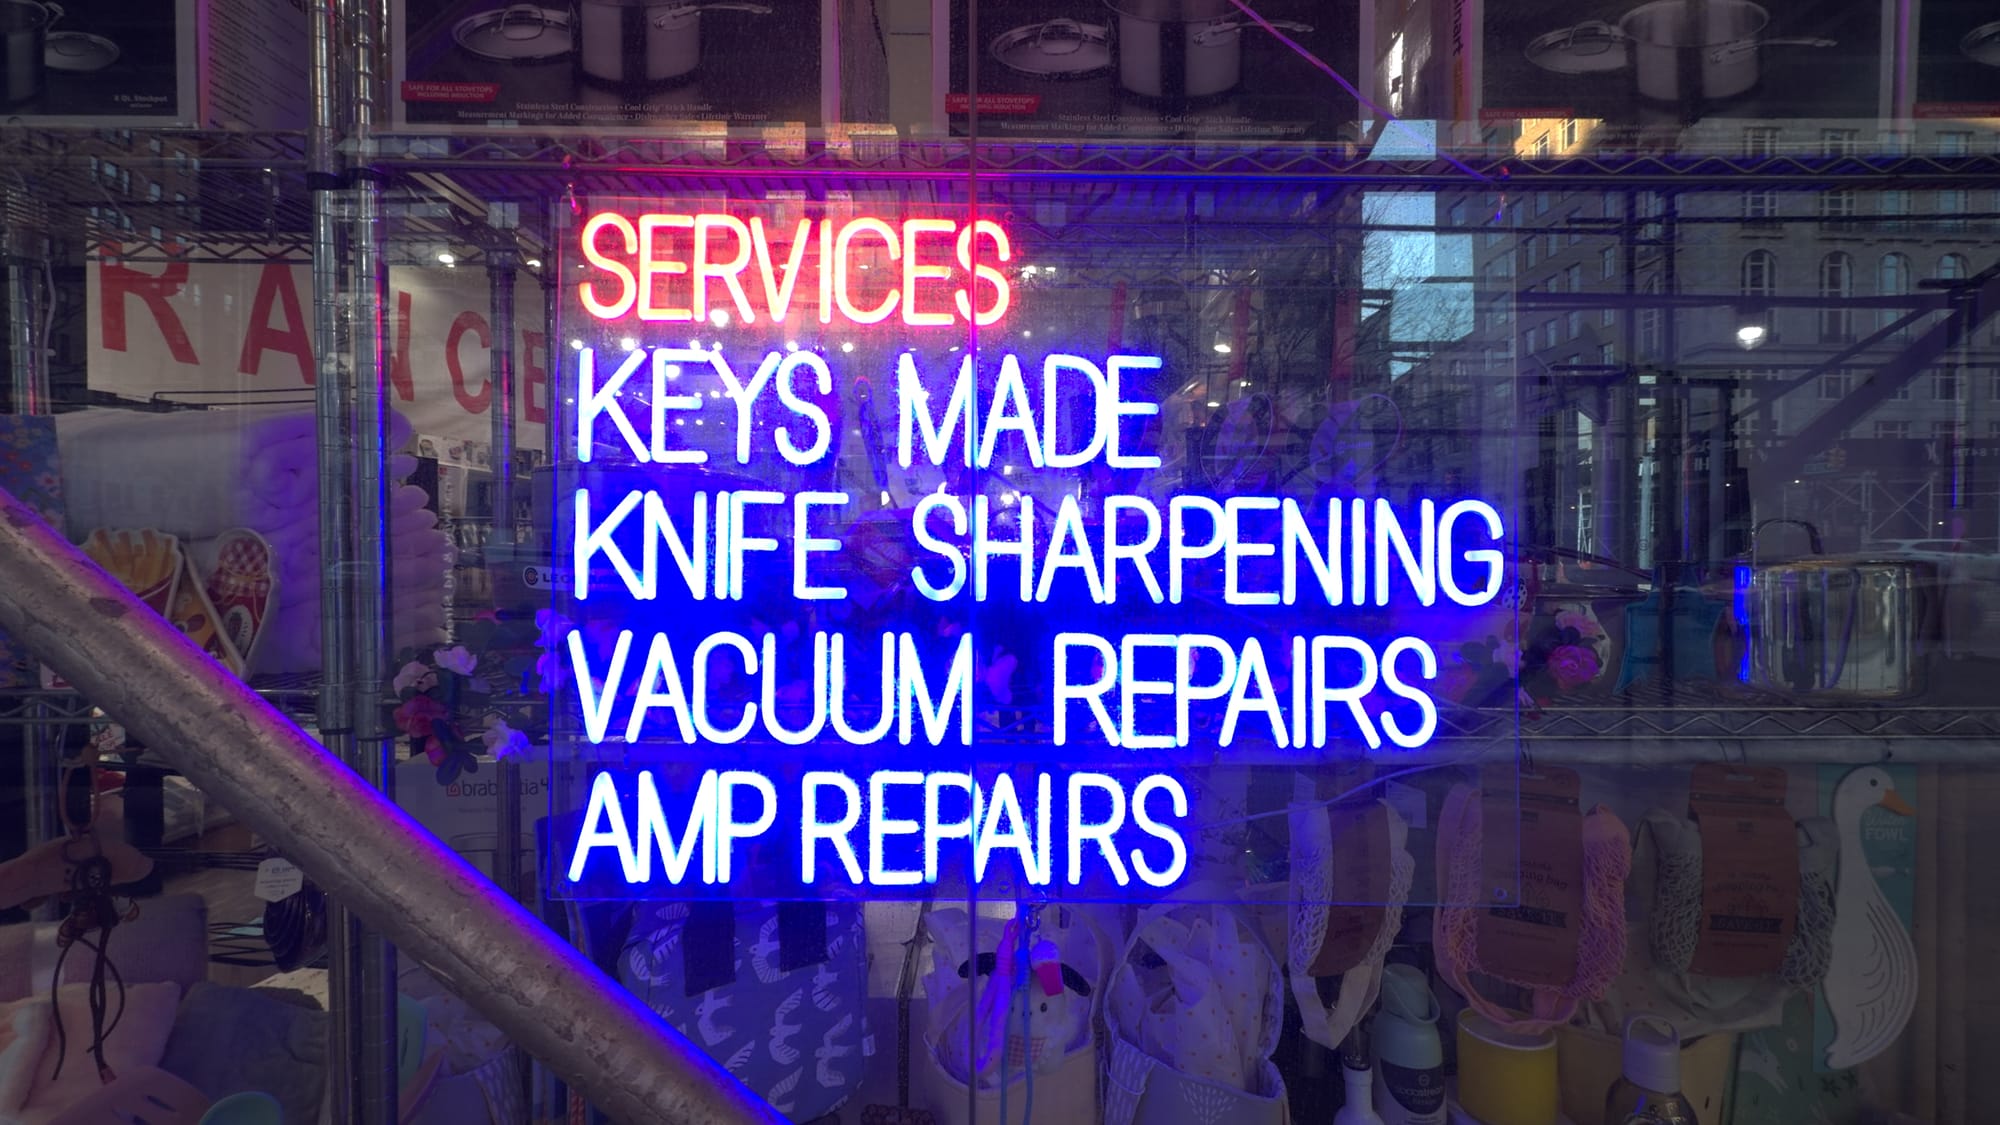
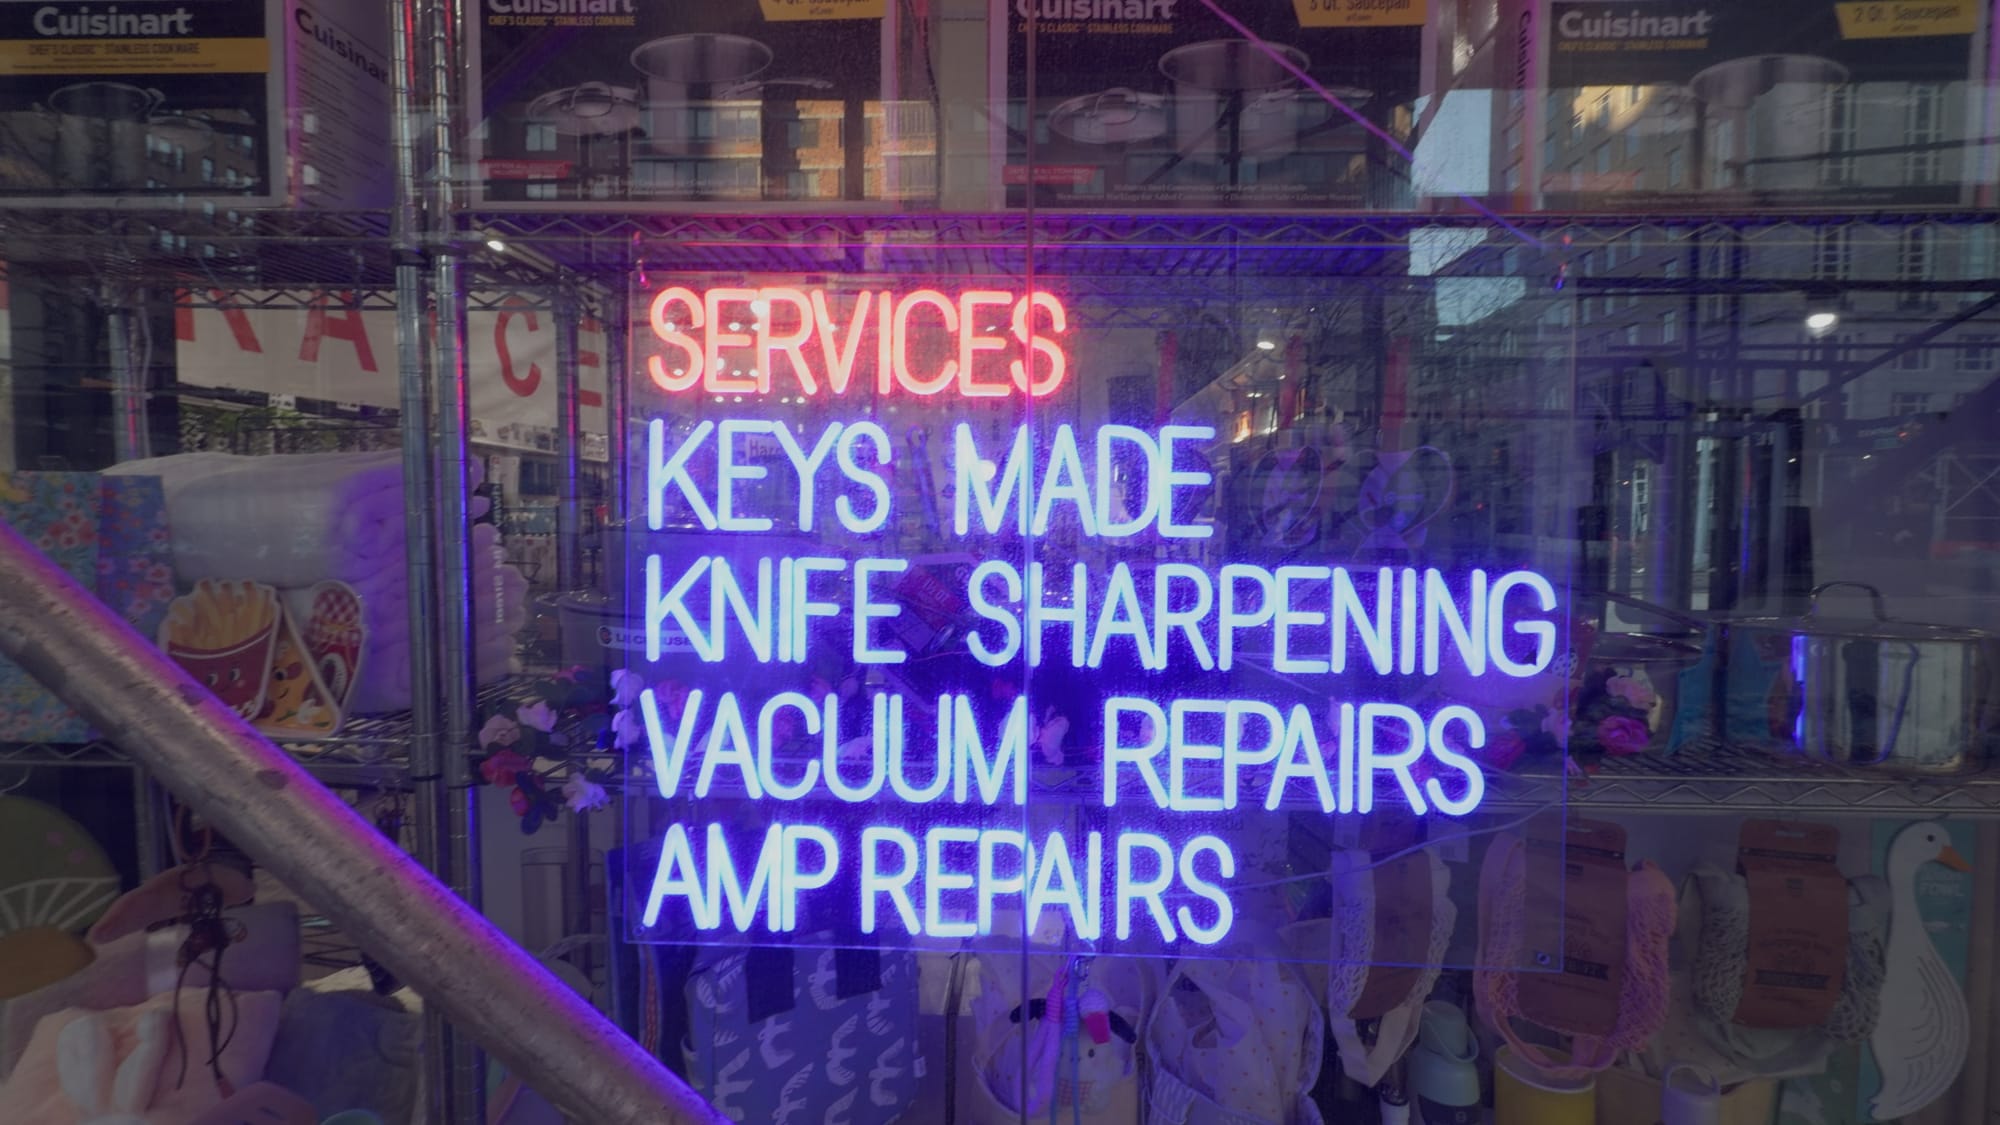
What happens if you try to display colors outside that triange? Things look weird, as in the case of this blue LED sign.
Luckily, camera sensors can record color outside of this range, whether or not you can show them. Professional colorists can use this extra color to ease things out in a more visually pleasing way.
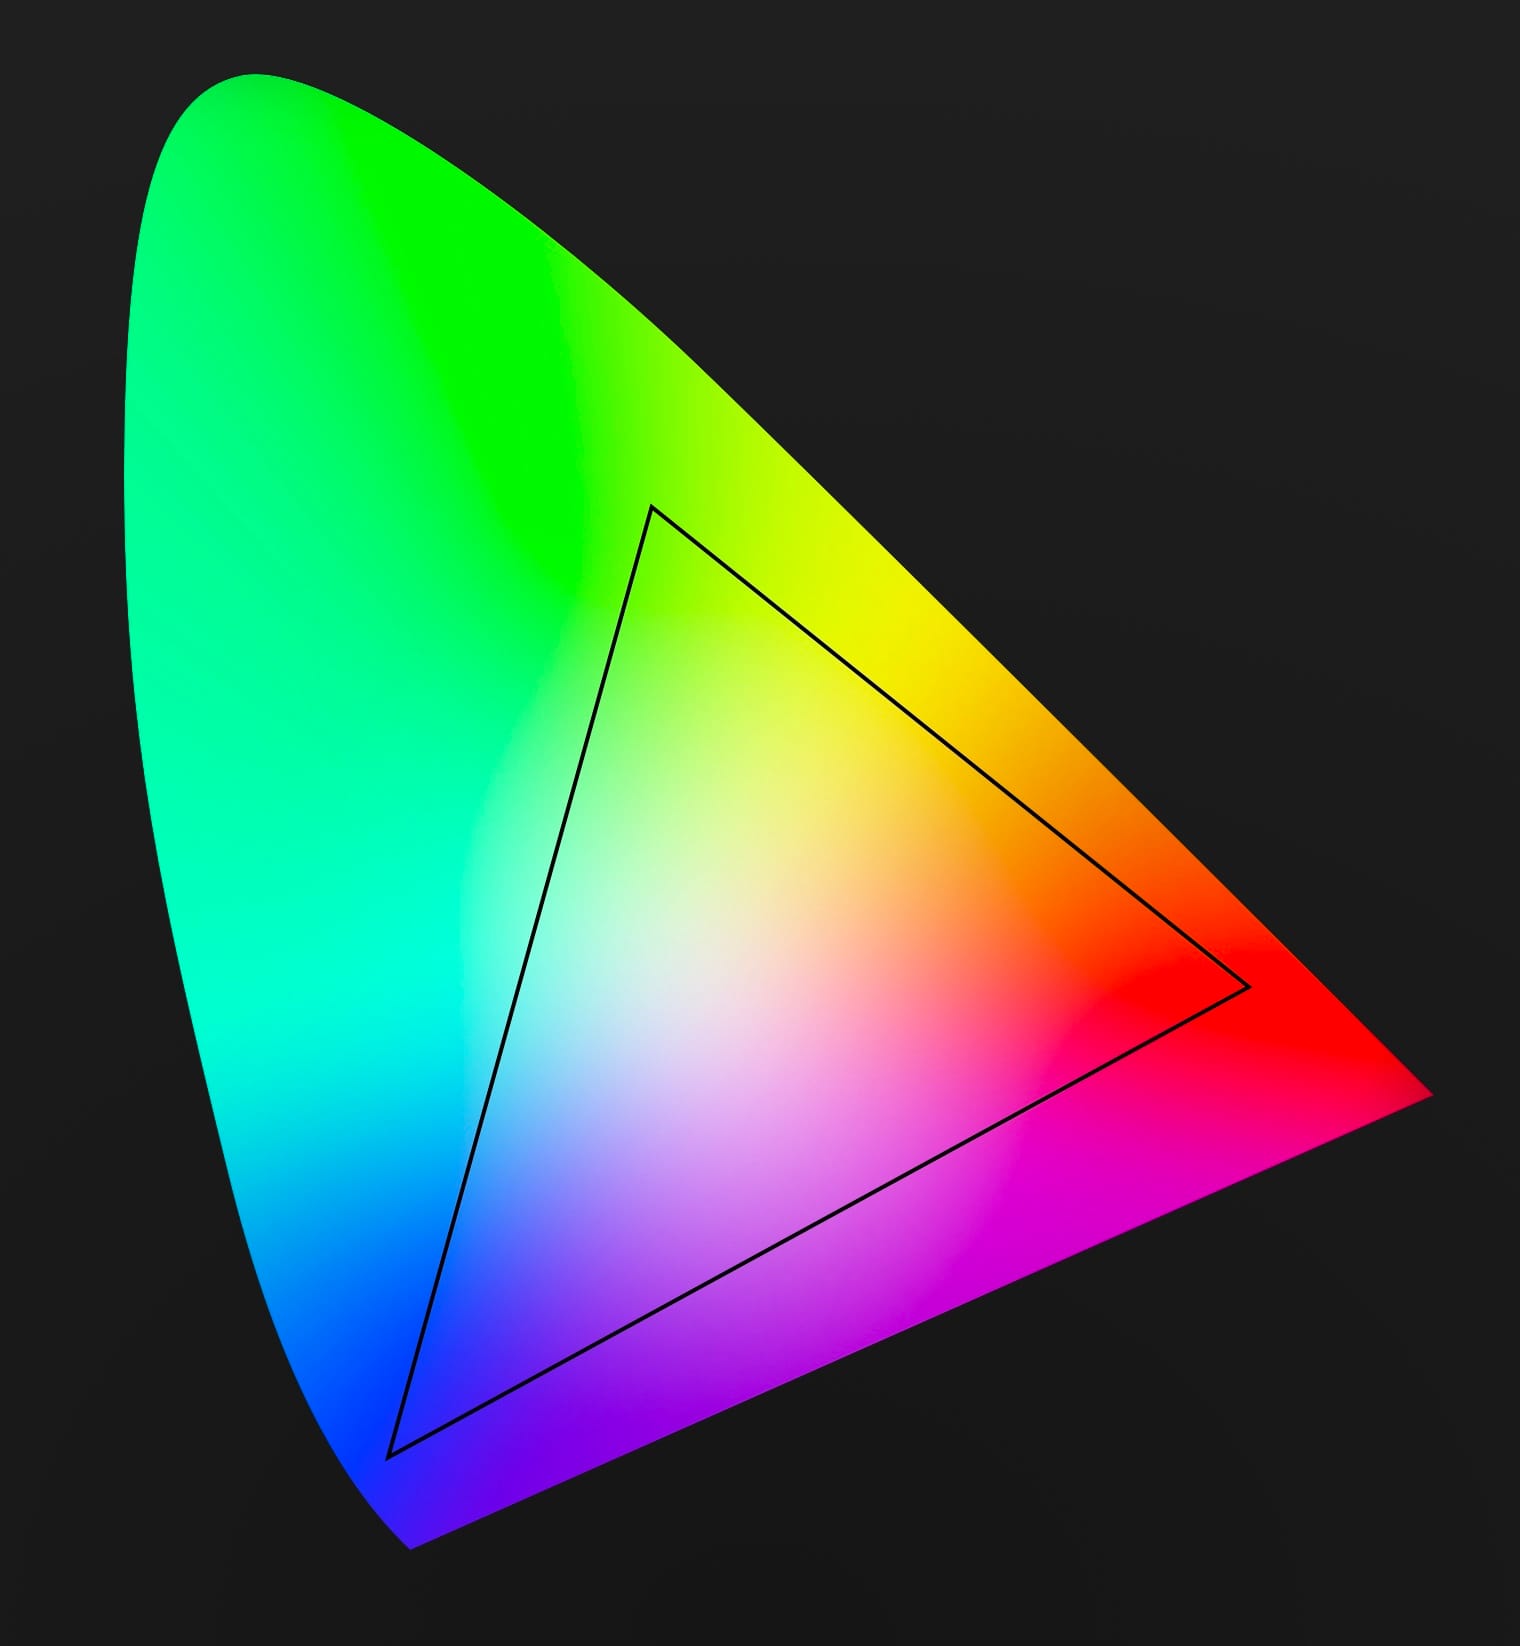
So what is the range of colors a camera can record?
The dark region falls outside the camera range, but this is still a huge upgrade.
If you got this far, you now understand the concepts of Log Video. Unfortunately, there's one more quirk that can be confusing: every camera manufacturer comes up with their own log video format. Sony has S-Log, Canon has C-Log, and Panasonic has, wait for it… V-Log. I guess they didn't get the memo.
These companies don't do this to lock you into their ecosystem. In fact, they all publish white papers to make it easy for people to create software that reads and writes their log variants. But why go to all that trouble in the first place? Why doesn't everyone agree on a single standard?
Different cameras use different sensors, and each sensor responds to light in slightly different ways. Every log variant is crafted to only include the most important data from the sensor, to make the most of the available bits.
Ok, we're finally able to talk about the difference between Apple Log and Apple Log 2.
Apple Log vs Apple Log 2
When Apple Log launched alongside the iPhone 15 Pro in 2023 it included a new log function, which meant you had greater control over the exposure and contrast of your videos. Unfortunately, it skimped out on color.
Instead of providing ranges specific to the iPhone, it specified a range identical to HDR televisions. Apple Log 2 provides unique real color ranges best suited for Apple's sensors. What's the difference?
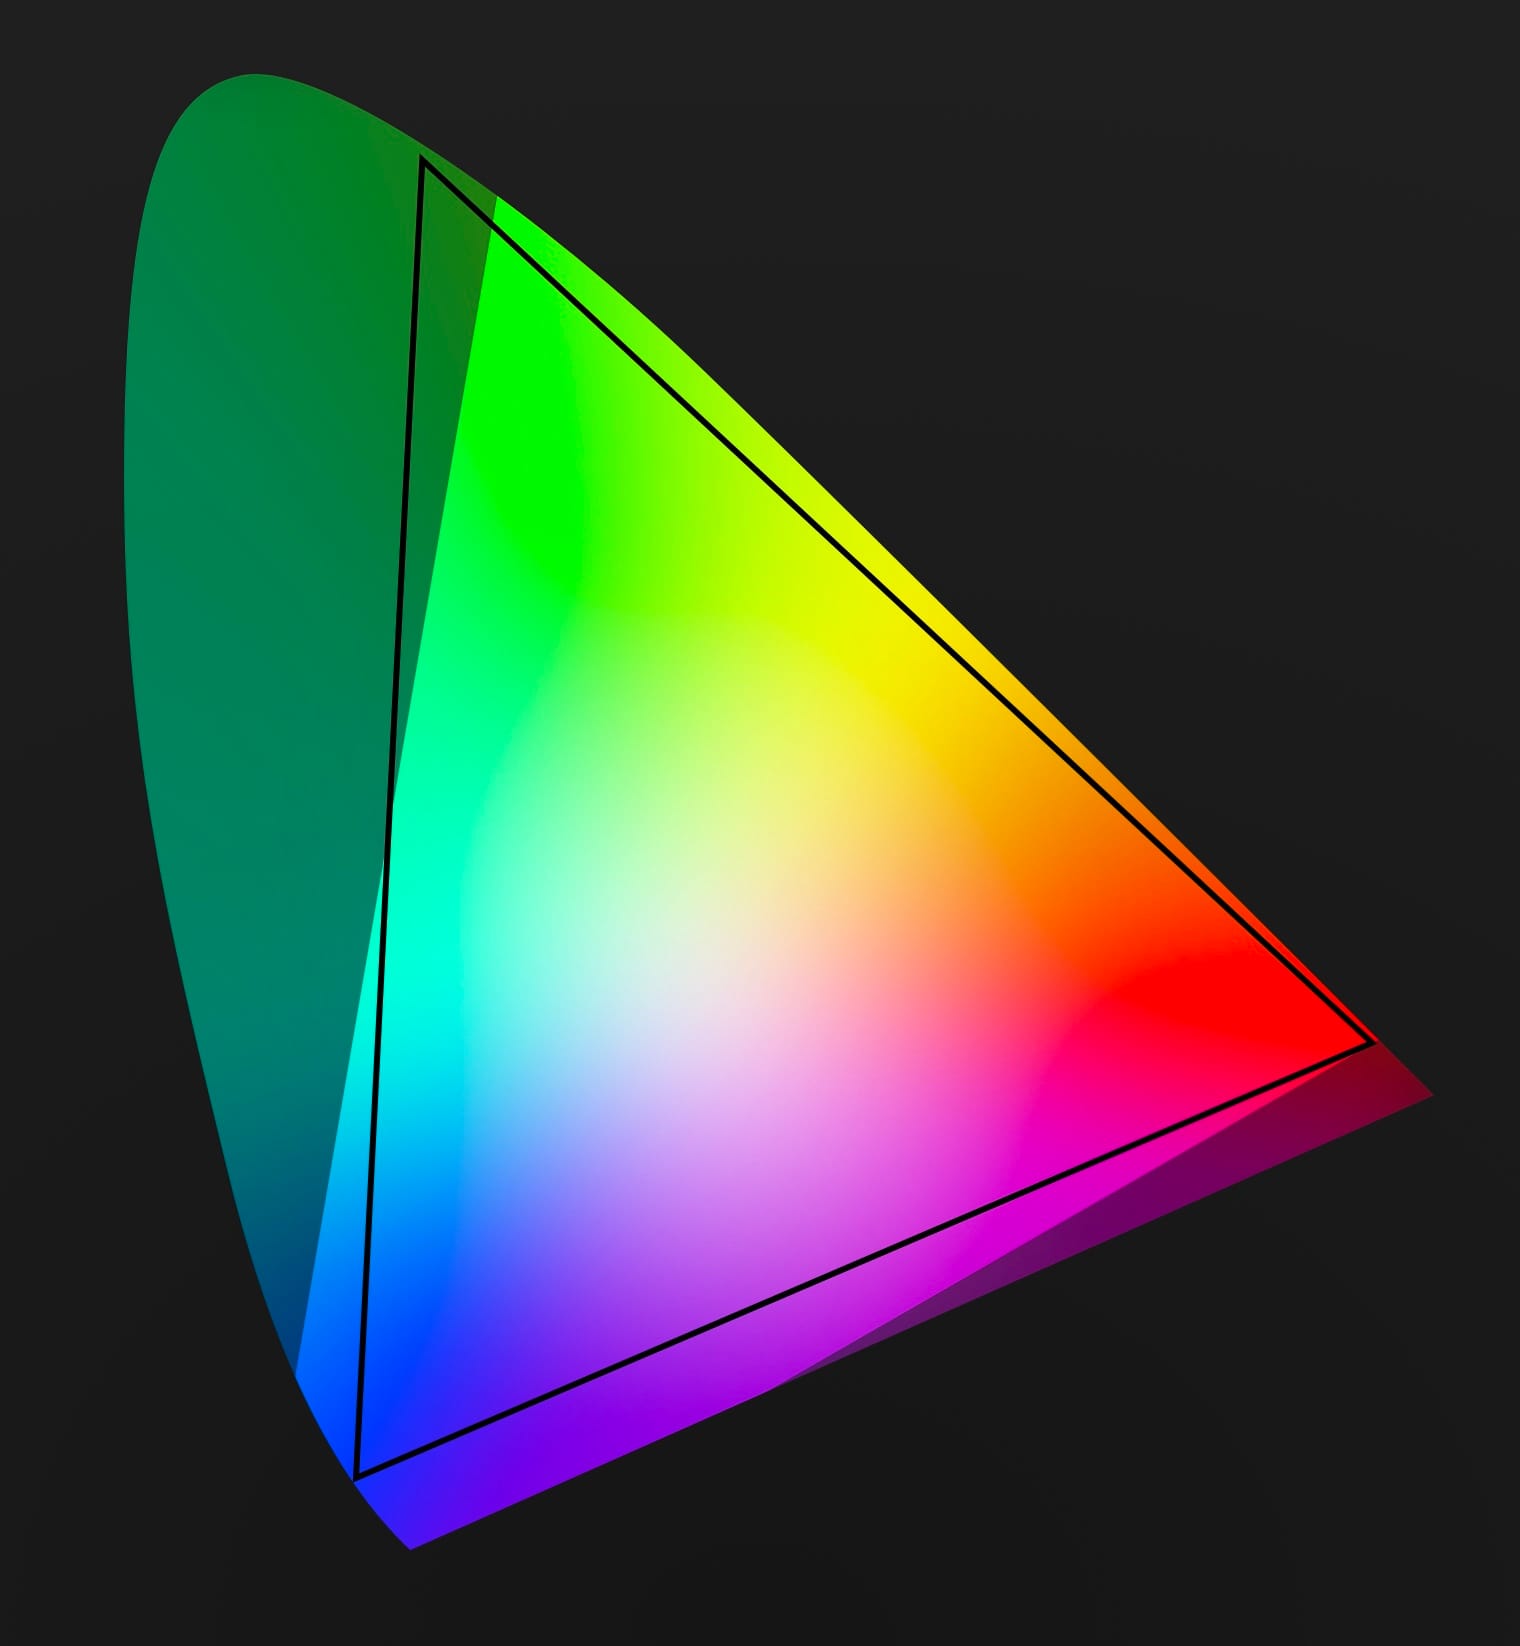
The first version of Apple Log is slightly flawed, as part of that black triangle falls outside of the range of colors an Apple sensor will produce. That's wasted bits. Not only does Apple Log 2 fix this, it also includes more color in deep blues and purples.
Apple Log 2 is definitely a step forward, but it doesn't make a big difference in everyday situations. You'll find it useful in niche situations, like neon lights or blue stage lighting. Apple Log 2 is great, but I wouldn't call it a "rush out and buy a new iPhone" improvement, unless you're shooting a John Wick movie.
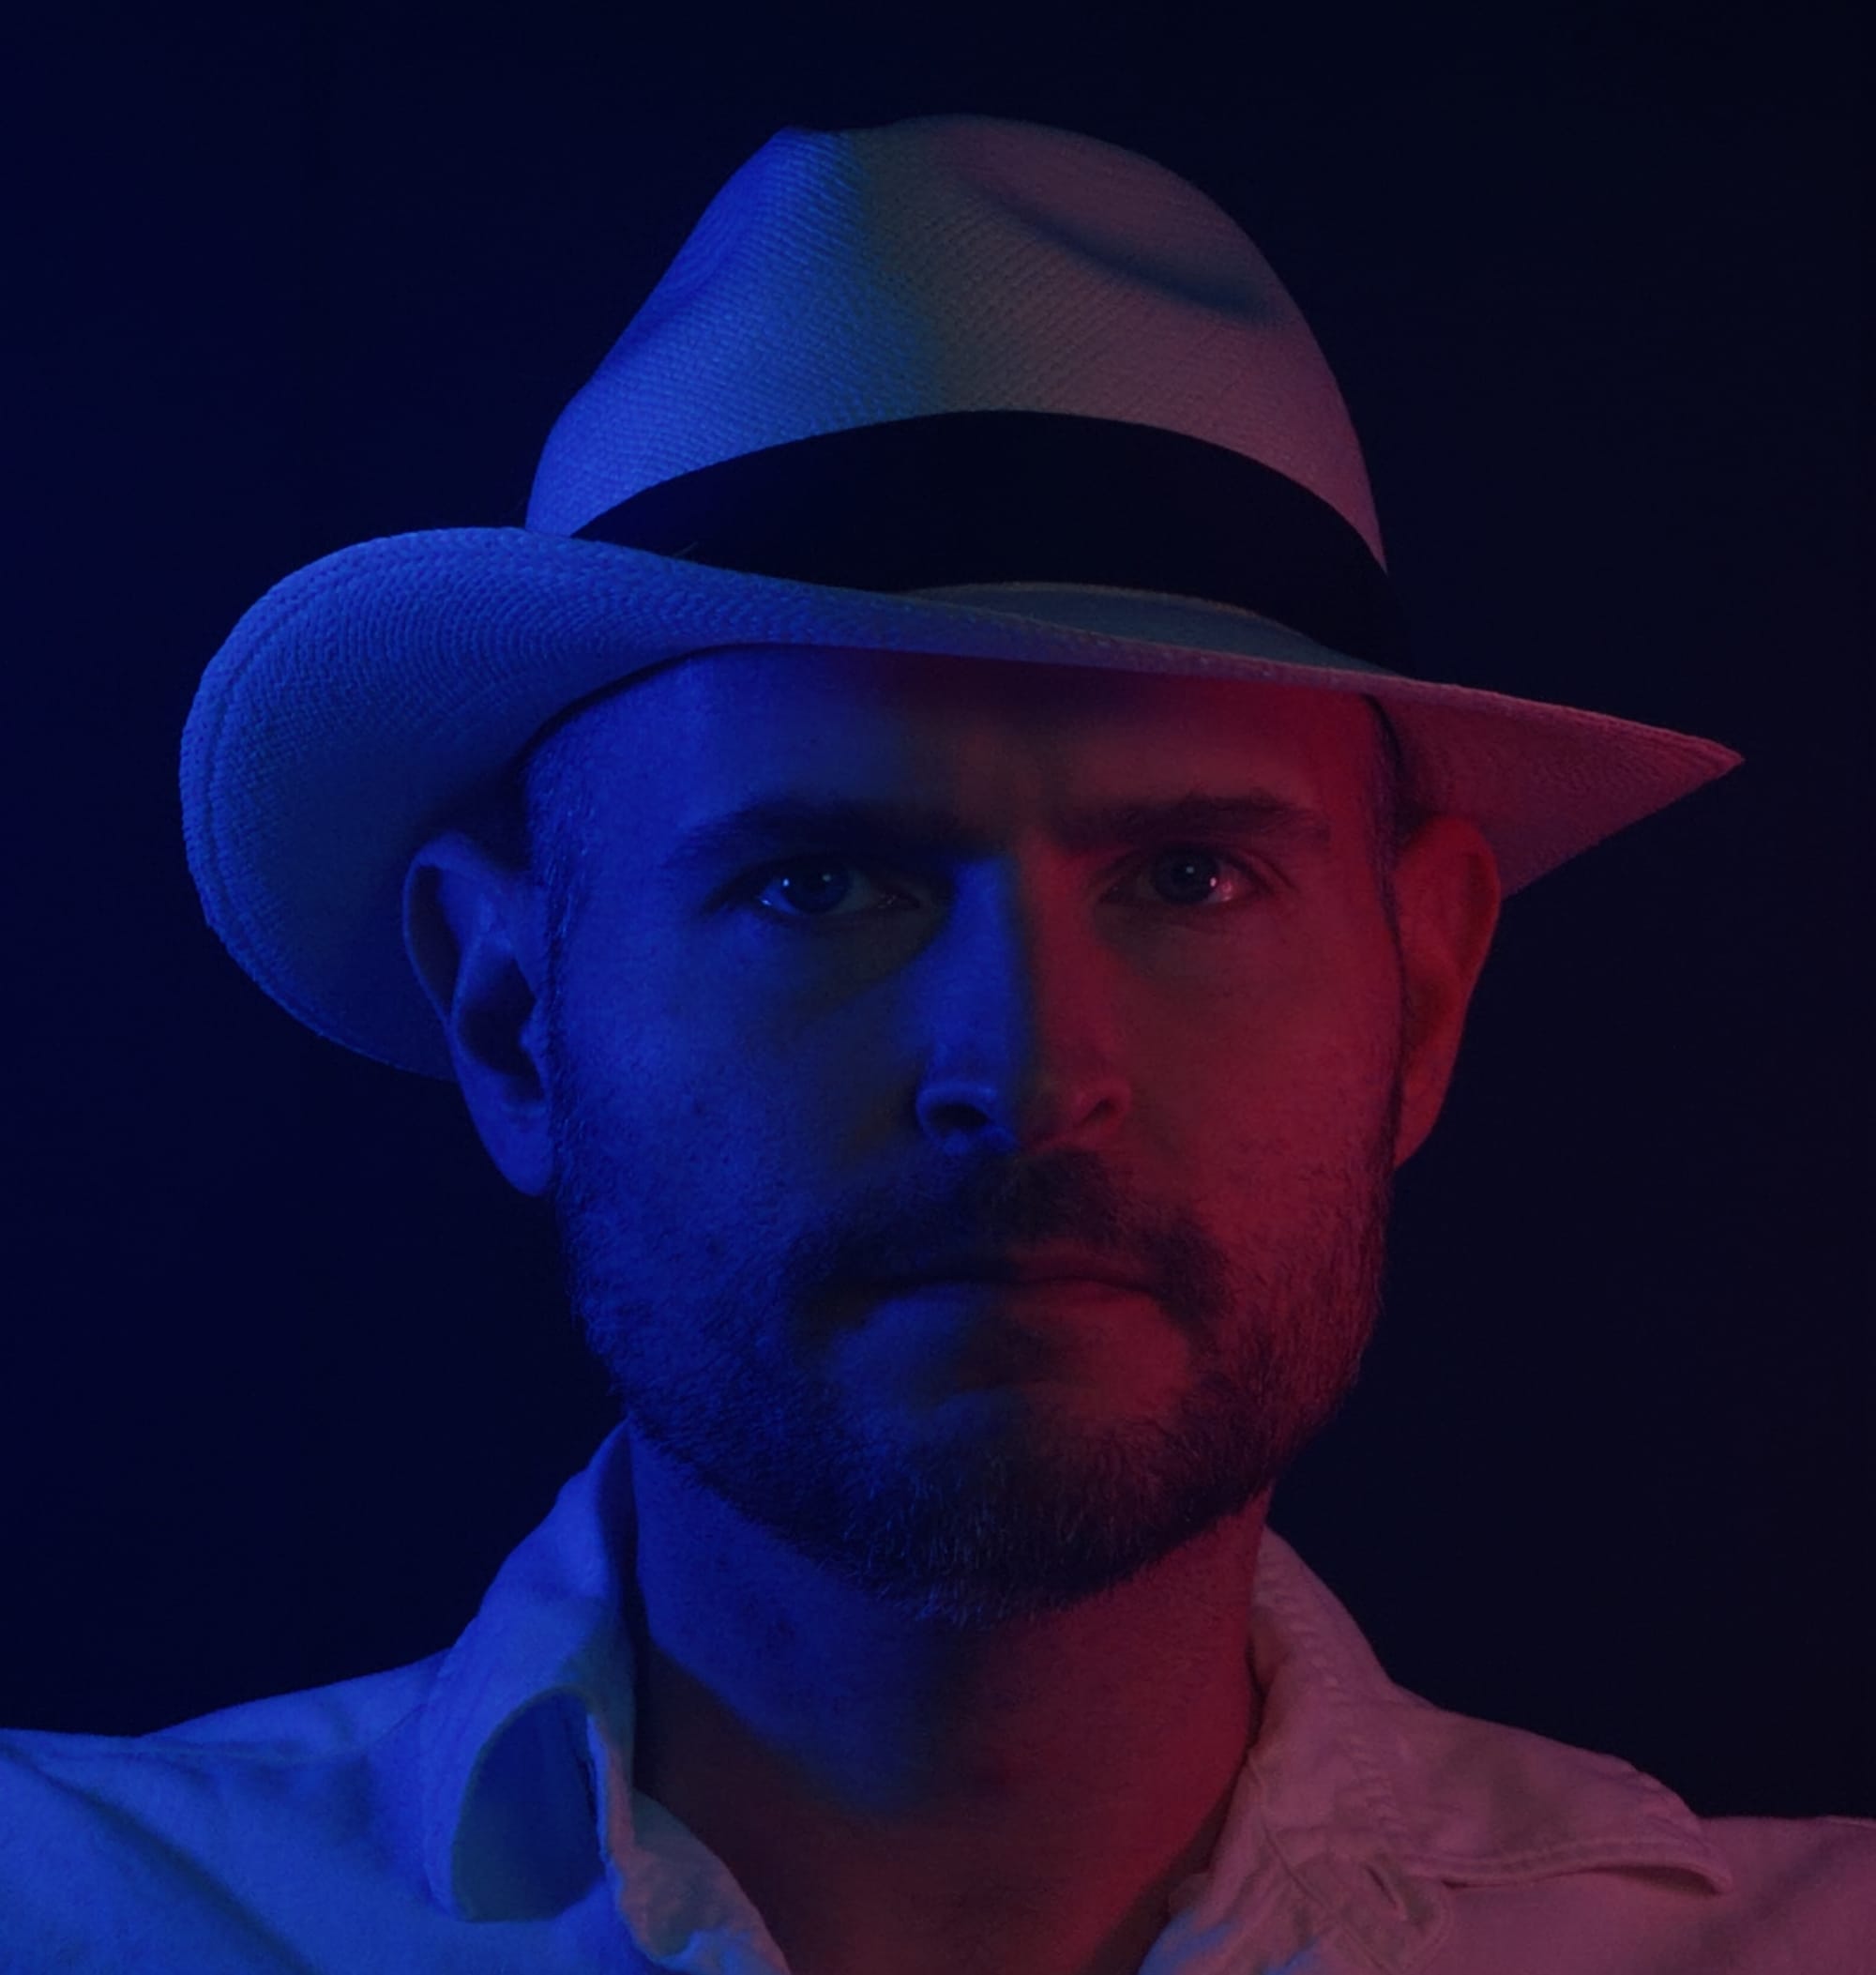

Apple Log 1 vs Apple log 2. "They call him 'The Panama Man,' Mr. Wick."
Kino 1.4: Now With Apple Log 2
Today Kino added support for Apple Log 2, because of course we need to offer the highest quality image. As you can tell by this post, Log video is a bit complex, so adding support took more than flipping a few flags. We had to expand some internals to accommodate the greater color range, detect different versions of Apple Log, and more.
We would have gotten this update out sooner, but if you've followed the company this past year, you know we've been heads-down on Halide Mark III, our flagship photography app. We promised to release a public preview of Halide by the end of January, which we did. We then immediately set to work on this Kino update.
I love working on Kino, our users love it, and I have ambitious plans ahead. However, the final version of Halide Mark III is still our top priority. So what do we do? Probably bounce back and forth between the apps for a bit. Big Halide updates will follow shorter Kino updates.
The long term plan is to unify the rendering system between the apps. As we just showed you, RAW photography and Log video are very similar. By unifying some technology, we can share technical improvements across both apps with less duplicated work.
In fact, my slight detour into Kino already helped with Halide Mark III. Both apps now use the new Apple Gamut colorspace for their image processing, the same colorspace that powers Apple Log 2.
That said, Kino and Halide will always remain separate apps. Photography and motion pictures are two separate art forms that call for very different user experiences.
You can download Kino 1.4 in the App Store today. Stay tuned for more updates!